Textures in Petz
There are two kinds of textures you will encounter when hexing breedfiles or pets; internal and external.
Internal textures are those stored within the game. There are quite a few that are used on the original breeds and you can easily view them with PWS.
External textures are textures you download or make yourself to use on your hexes.
There are specific requirements for textures (dimensions, colours etc) that I am not going to go into here.
The Texture List
Every breedfile or .pet file has a texture list.
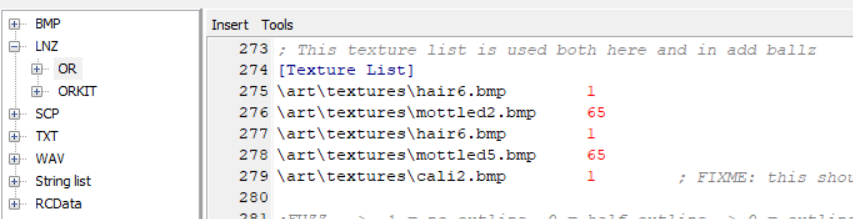
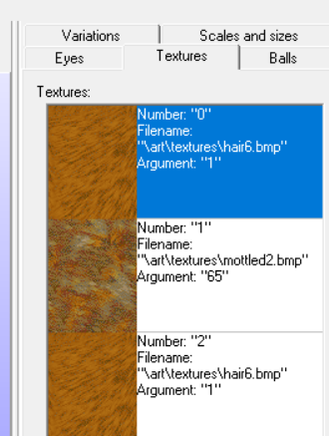
Here is what the texture list for an Orange Shorthair looks like in LNZPro.
Here is what the texture list for an Orange Shorthair looks like in LNZPro.
Breedfile (.cat)
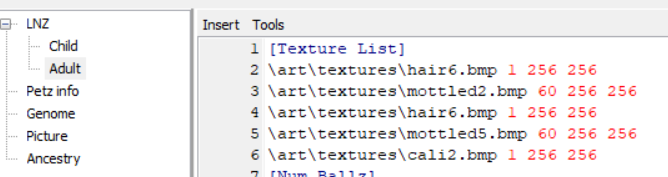
.pet file
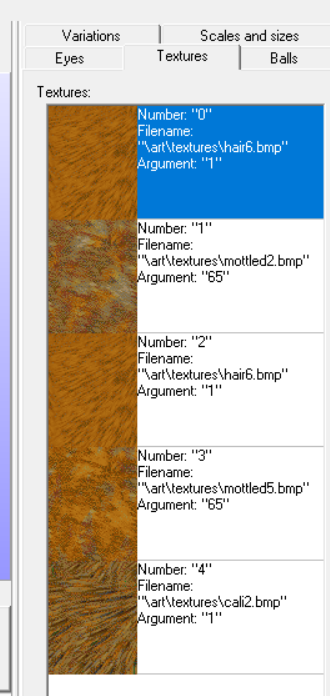
You can see this same texture list in the Textures tab of PetWorkshop.
Setting & Checking Transparency
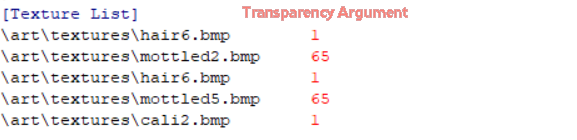
The red numbers to the right of each texture indicate the transparency of the texture.
0 = show texture unchanged (not transparent)
1 = colour texture with ball colour
You can also set a custom transparency, which in this example is why we also have the number '65'.
What this 65 does is tell the game to make any portions of the texture that are coloured 65 (orange) transparent, letting the ball colour underneath to come through.
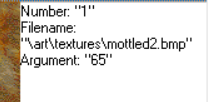
This information is also available in the description of textures in PWS. Here you can see that mottled2.bmp has the Argument "65" in the Orange Shorthair.cat breedfile.
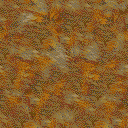
mottled2
|

mottled5
|
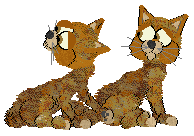
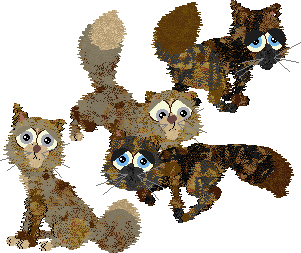
The default Orange Shorthair is 65-coloured under the texture so you cannot tell that the texture is partially transparent...
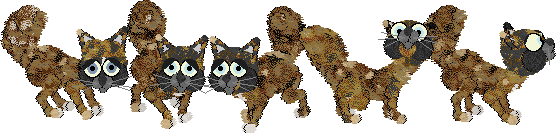
But here are some cats that are mostly 35 (black) under the texture:
Note that textures of any kind will only appear if they are overlayed on a ball with a texturable colour. 10-149 are texturable. If you try to put a texture on a ball that's coloured 172, for example, it will not work.
You can also set the texture transparency to something different such as 105 for different results! This is a quick and fun way to change the appearance of default breeds and spice up bred pets.
You can also set the texture transparency to something different such as 105 for different results! This is a quick and fun way to change the appearance of default breeds and spice up bred pets.
Adding External Textures & Checking File Paths
If you have an external texture you'd like to use in your file, you can either replace one of the default textures with it or you can add more textures to the list. Your new texture's file path will reflect where you put it. Many people put their textures in resource\catz or rezource\dogz (depending on species) or in a subfolder within the catz or dogz folder. Or even in a separate folder within the resource folder. It doesn't really matter but I will use the catz folder in these examples because that is what I do.
Here is an example of replacing one of the original textures with a non-transparent (argument 0) external texture and changing the file path:
[Texture List]
\art\textures\hair6.bmp 1
\resource\catz\blacksmoke.bmp 0
\art\textures\hair6.bmp 1
\art\textures\mottled5.bmp 65
\art\textures\cali2.bmp 1
What this will do is replace mottled2 with this new texture anywhere where mottled2 was being used before.
*Note that if you use PWS to add external textures, the file path will be an internal one by default. This will only work temporarily in the game. So you need to edit the file path to point to the correct location of your texture. It may stop showing up correctly in PWS when you do so but ignore that. You can edit the file path to the correct one either in LNZPro or by clicking "Edit" at the bottom of the Textures tab in PWS.
Changing Where Textures Are Used
In the above example we replaced a default texture with a new one. But what if we add a new texture to the list or want to change where a particular texture is being used?
[Texture List]
\art\textures\hair6.bmp 1 (0)
\art\textures\mottled2.bmp 65 (1)
\art\textures\hair6.bmp 1 (2)
\art\textures\mottled5.bmp 65 (3)
\art\textures\cali2.bmp 1 (4)
\resource\catz\blueglitter.bmp 0 (5)
Textures in the list are counted from 0 down the rows. I've added numbers in purple brackets above to show you what I mean.
In LNZPro there are no numbers; you just have to count.
In PWS they are numbered for you - see 'Number "0"', 'Number "1"' etc
To change the texture of a particular ball, addball, or paintball, you will need to scroll down to that section, locate the relevant ball, and find which column corresponds to texture.
Let's use an example from the [Ballz Info] section. In an unedited breedfile, the columns are conveniently labelled like so:
Let's use an example from the [Ballz Info] section. In an unedited breedfile, the columns are conveniently labelled like so:
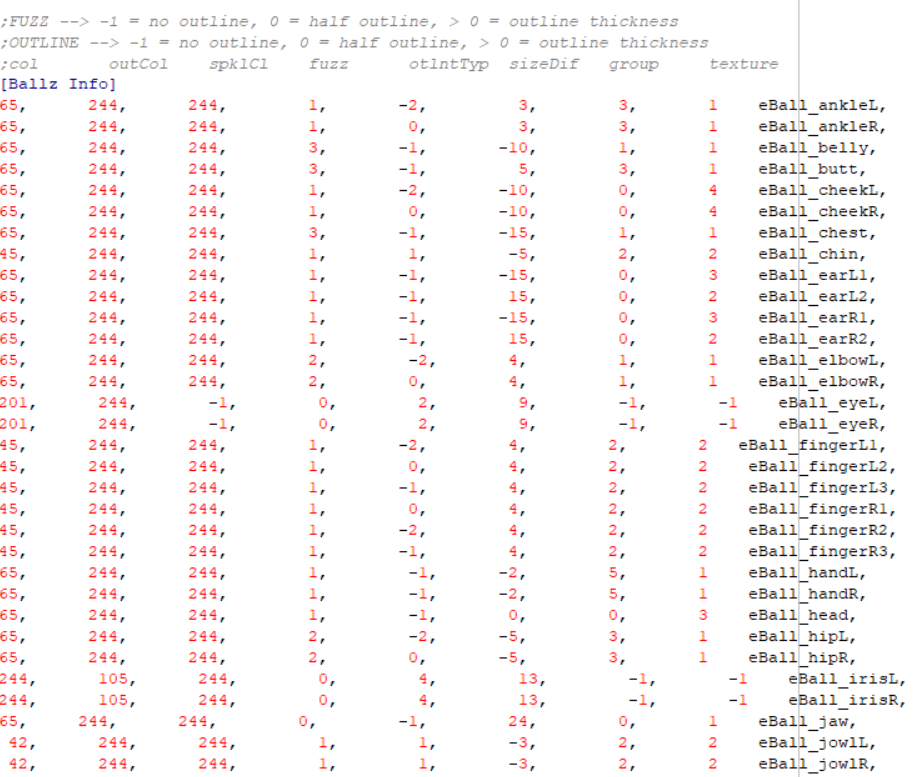
So if we scroll down to the Head ball (labelled in this case but we could simply count down, from 0, to ball 24 if it wasn't) and look across to the last column, which is labelled as the Texture column, we see that the head ball has the texture "3". (Note that "-1" means untextured.)
Now if we go back up to our texture list, we'll see that this corresponds to mottled5.bmp . If we want the head ball to use our new blueglitter.bmp texture instead, all we need to do here is change that 3 to a 5!
Note that you can have more textures in your texture list than you use but a very common source of errors and crashing files is when you have assigned a texture number to a ball that doesn't correspond to any texture in the list. For example, if I were to replace 3 with 7 rather than 5, the file would not work because there is no texture "7" in my textures list.
